EN

Specifying a Refrigeration and Heating Package for 4.2 m Body Builds: An Integration Checklist
Specifying a Refrigeration and Heating Package for 4.2 m Body Builds: An Integration Checklist
For a body builder, a refrigeration unit is not a product — it is an interface. It arrives with mounting points, pipe stubs, a wiring loom and a controller, and everything about it has to agree with a body that is already designed. When the interfaces match, installation is a two-person job. When they do not, the unit becomes a fabrication project.
This checklist is for the people doing that integration: body builders, fleet workshops and importers who assemble locally. Working examples are DEFU's 5.0 kW Gooseneck unit, the Underslung unit and the All-in-One Diesel Hydronic Heater.
1. Lock the mounting architecture before the body drawing is released
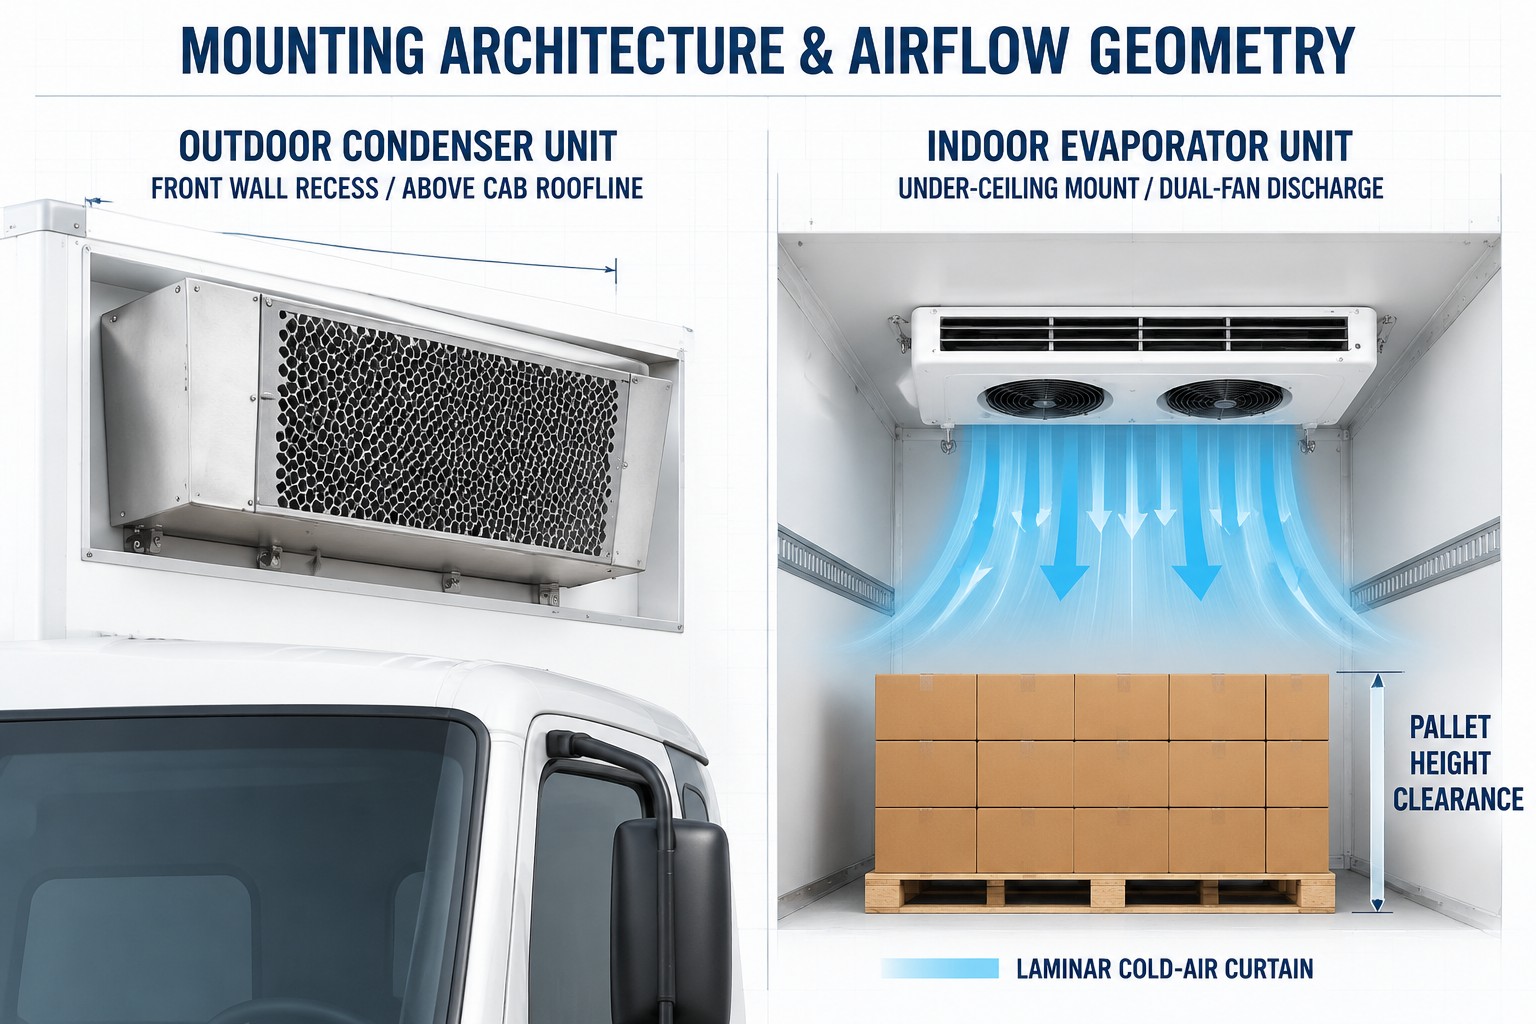
The most expensive mistake in this workflow is choosing the mount after the box is designed. A gooseneck needs a front-wall recess and a condenser compartment above the cab line, both of which must be in revision one of the drawing. An underslung needs chassis bracket space and a clear pipe route from the underside into the ceiling blower, so the drawing needs the blower cut-out and penetration positions.
Ask for the mounting drawing in DXF or dimensioned PDF at quotation, not at shipment; a supplier who cannot provide one is a specification risk.
2. Confirm box geometry against the evaporator
The gooseneck evaporator delivers airflow at multiple heights from a slim indoor unit; the underslung platform uses a ceiling-mounted TR45 three-fan blower with a ducted cold-air curtain. Both need internal height confirmed: pallet height plus clearance must remain below the blower, the cold-air path must not be blocked by the first row of pallets, and door openings should align with the air curtain rather than sit outside it. A loaded box that blocks its own duct is a common cause of "the unit doesn't hold temperature".
3. Route pipes as a system
Both platforms use a conventional circuit: compressor, oil separator, condenser, receiver drier, sight glass, expansion valve, evaporator. Good for serviceability, but it makes the pipe run a design element. Minimise length and bends, especially on the suction line. Support the lines every 500–700 mm and isolate them from chassis vibration. Keep liquid and suction lines apart where they run in parallel. And provide access to the sight glass — a technician who cannot see it cannot charge the system correctly.
4. Define the electrical handshake
The compressor is engine-driven but the system is not electrically passive. Agree the DC voltage, 12 or 24 V, matched to the vehicle. Agree whether the controller takes ignition-switched or permanent live, so it does not lose settings at every key turn. Agree where the in-cab controller mounts: visible to the driver, out of the airbag zone, reachable without leaving the seat. And agree who supplies the harness, because ambiguity there is the usual cause of a first-start delay.
5. Add the heating loop at the same revision
Winter capability is cheapest when designed in. The all-in-one hydronic heater at 10–40 kW, with integral fuel-water tank, brazed plate exchanger and dual voltage, can be specified as a separate unit into the same body revision. Do it later and you add a second fuel pick-up, a second circuit and a second set of penetrations. If the body may carry temperature-sensitive goods in winter, reserve the space now even if the first buyer does not order it.
6. Demand six documents
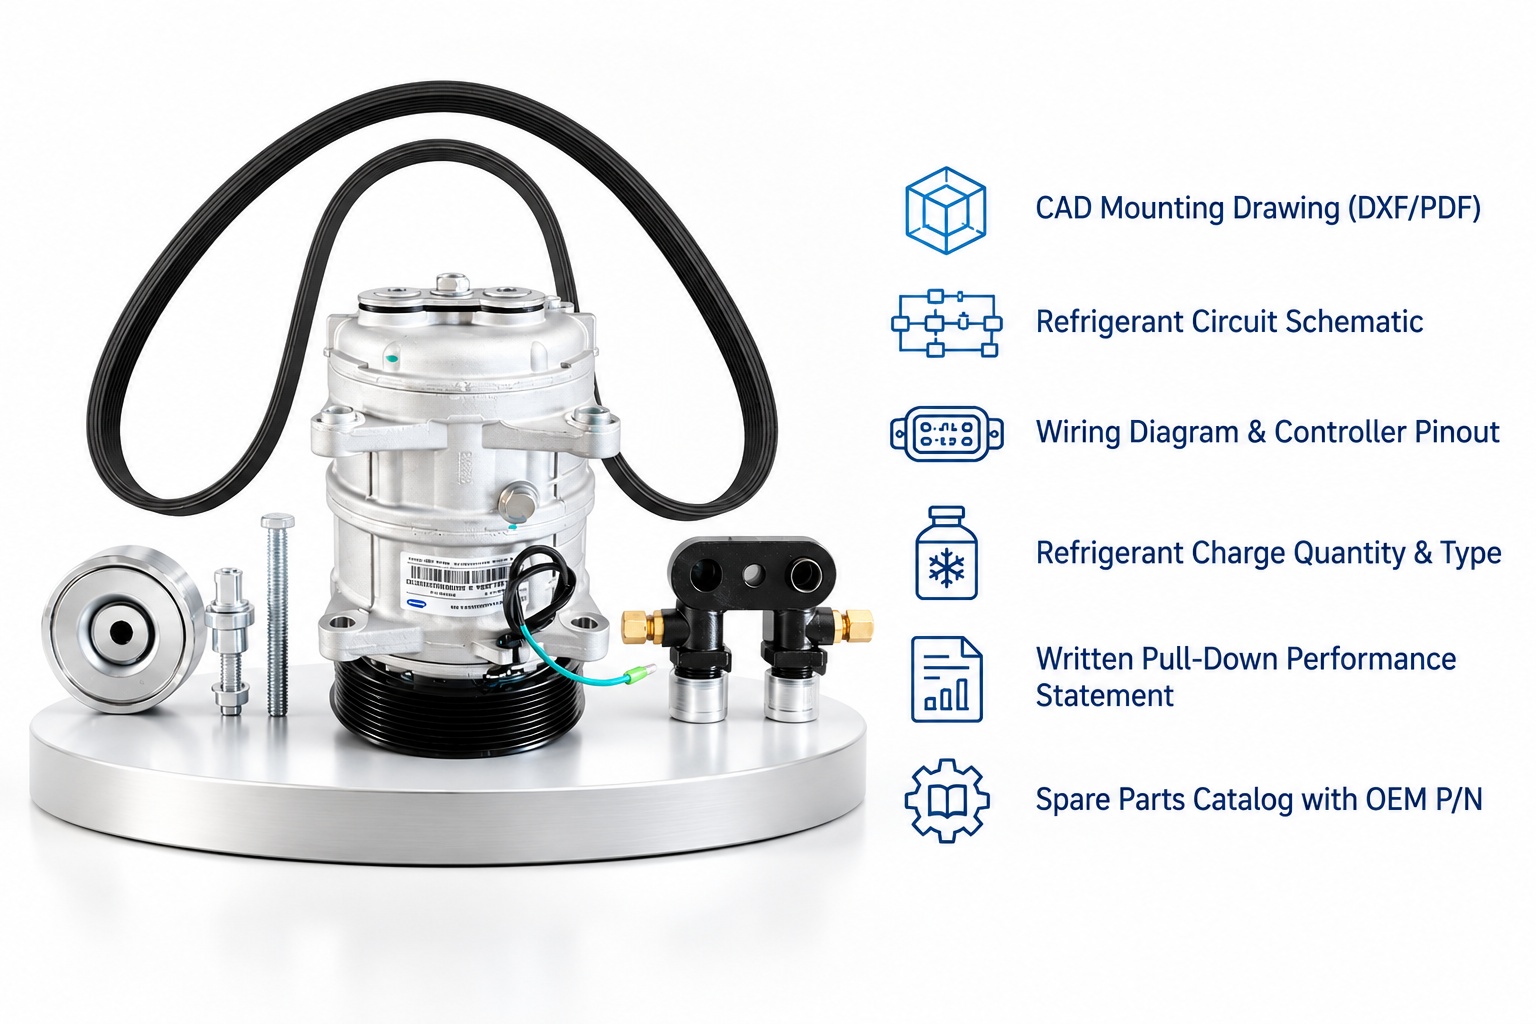
Ask for the mounting drawing, the refrigerant circuit schematic, the wiring diagram with controller pinout, the refrigerant charge quantity and type, a written pull-down performance statement, and a spare parts list with part numbers. Five of six is workable; three means guesswork in year two.
7. Agree the acceptance test in writing
Make the handover measurable: ambient at test start, box temperature at test start, time to setpoint with a defined load, box temperature at three points after thirty minutes at setpoint, and controller reading against a calibrated probe. Photograph the display at each step. Twenty minutes here settles every future warranty argument.
8. Plan service access you will actually use
Ask your workshop two questions before the first build: can they reach the condenser, and can they reach the sight glass and receiver drier without removing body panels? If not, adjust the design. A serviceable installation gets serviced.
Standardize across the programme
If you build the same 4.2 m body repeatedly, standardize the mount, the pipe route and the controller position across the programme. Later builds then take a fraction of the first build's engineering time.